- Summertime is Summer Tire Check Time: 7 Tips To Combat 11,000+ Tire-Related Accidents Annually — and Keep Tires Rolling for Longer
- 10 DIY Tips to Add Years to a Vehicle’s Life & Minimize Expensive Repairs
- Defensive Driving Tips to Avoid Costly Repairs As Wintery Driving Conditions Continue to Plague Roads
- AutoPartsWarehouse.com 2013 Child Passenger Safety Tips and Resource Guide
- Top Five Parts to Make Your Vehicle More Fuel Efficient
Sylvania SilverStar ULTRA Headlight Bulb Install -2009 Honda Pilot
Sylvania SilverStar ULTRA Headlight Bulb Install -2009 Honda Pilot
by AutoPartsWarehouse.com staff
Difficulty level: Easy

Our 2009 Honda Pilot EX-L has been a faithful family truckster, hauling our crew to Girl Scout meetings, soccer matches and many road trips over the last seven years. With 100,000 plus miles on the odometer, we have kept up on maintenance and the Pilot is in great condition.
With winter darkness arriving earlier and staying into the rush hour to work, we realized that our headlights seemed a bit dimmer than before. While our original polycarbonate headlight lenses are in good condition we realized that we haven’t ever replaced the headlight bulbs. A quick visit to AutoPartsWarehouse.com helped us find the best bulbs available.
Here is a comparison of the new bulb and the old bulb:
Sylvania has a well earned reputation for high quality and long lasting products and their latest SilverStar Ultra bulb claims to offer whiter and brighter downroad lighting and best night clarity than the previous SilverStar bulb. We chose a pair of H11 ULTRA bulbs for our Pilot and were anxious to see the results our new bulbs would produce.
Changing bulbs is usually a relatively easy task that anyone can do at home. Typically, hand tools aren’t required to swap bulbs, just a pair of gloves and a little patience. The space behind the headlights is cramped and access is limited; take your time to avoid damaging connectors or the headlights.
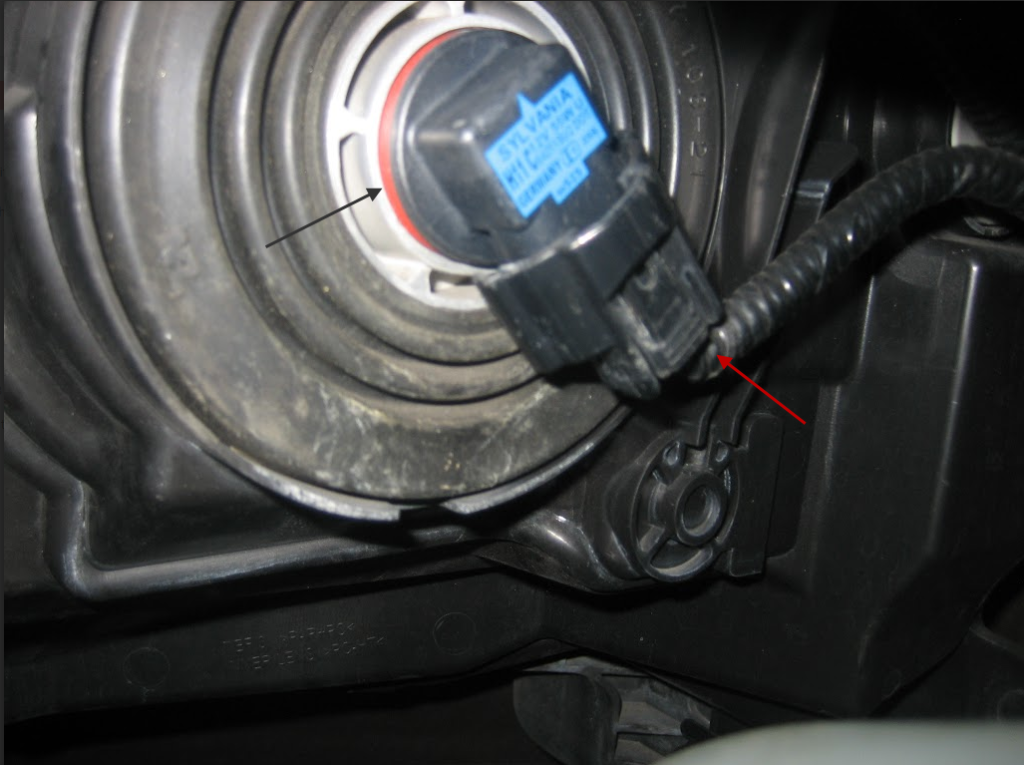
Starting in the engine compartment, find the wiring harness and follow it to the back of the headlight assembly to locate the bulb and the connector securing the bulb in the headlight housing. Disconnect the wiring from the back of the headlight by gently pushing the tab (red arrow) on top to release it from the bulb. The next step is to gently twist the bulb (blue arrow) to release it from the headlight fixture. Insert the new bulb into the headlight and gently twist it into the back of the headlight. Take a moment to confirm that the bulb is firmly in position; a loose bulb will allow moisture or vibration to shorten the life of the bulb. Next, listen for the click of the connector on the bulb to ensure it’s engaged on the bulb. Since you should always replace headlight bulbs in pairs, continue to the other headlight and repeat the process.
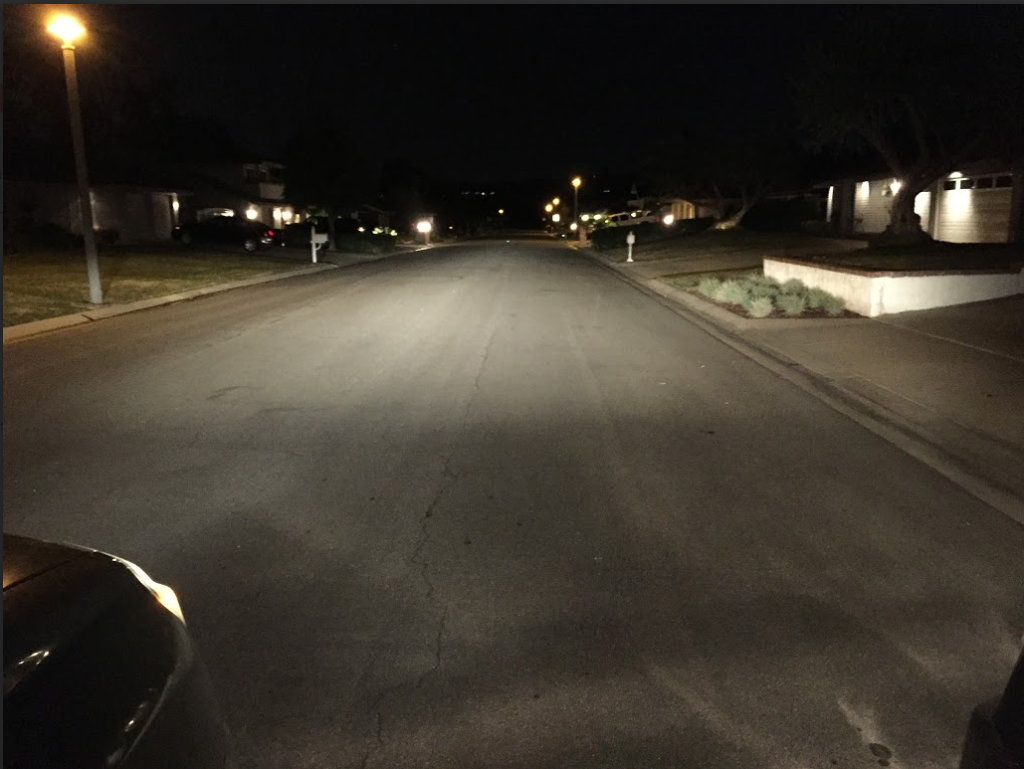
Here is a side by side comparison-both vehicles are 2009 Honda Pilots-you can see the brighter, more intense SilverStar ULTRA bulb in the black vehicle versus the “standard” headlight bulbs installed in the white vehicle.
Here’s another side by side perspective:
“Standard” Headlight Bulbs in the white Honda Pilot: note the brightness and intensity of the light.
SilverStar ULTRA: Note how much brighter and whiter the light is from the Black Honda.
After driving the two Pilots’ back to back, we saw that the new Sylvania SilverStar ULTRA bulbs provided much more downroad light and excellent clarity. If your headlights bulbs are over 5 years old we strongly recommend new bulbs and the Sylvania SilverStar ULTRA bulb is a great choice.
To learn more about Sylvania Bulbs for your car please visit:
https://www.sylvania.com/en-us/products/automotive/Pages/silverstar-ultra.aspx
To see Sylvania Bulbs for your car please visit:
http://www.autopartswarehouse.com/shop_brands/sylvania.html


