- Summertime is Summer Tire Check Time: 7 Tips To Combat 11,000+ Tire-Related Accidents Annually — and Keep Tires Rolling for Longer
- 10 DIY Tips to Add Years to a Vehicle’s Life & Minimize Expensive Repairs
- Defensive Driving Tips to Avoid Costly Repairs As Wintery Driving Conditions Continue to Plague Roads
- AutoPartsWarehouse.com 2013 Child Passenger Safety Tips and Resource Guide
- Top Five Parts to Make Your Vehicle More Fuel Efficient
Arnott Shock Install
Project: Arnott Shock Install
Vehicle: 2007 Chevrolet Suburban LTZ with Autoride rear airshocks, Front coil over shock assembly
Installed By: Steve Maloof
Level of Difficulty: Moderate, some special tools required
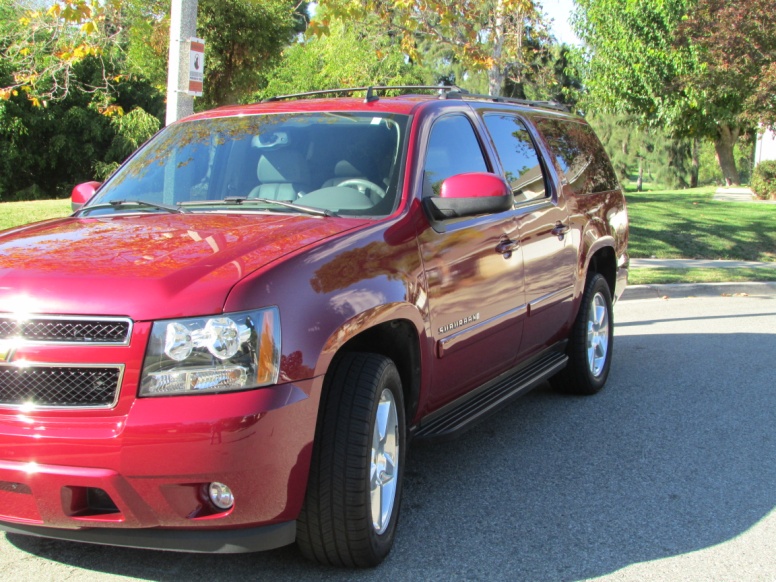
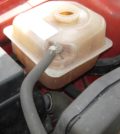
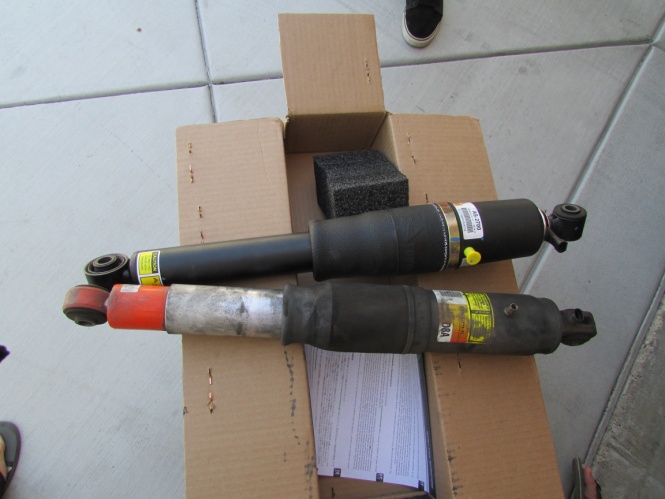
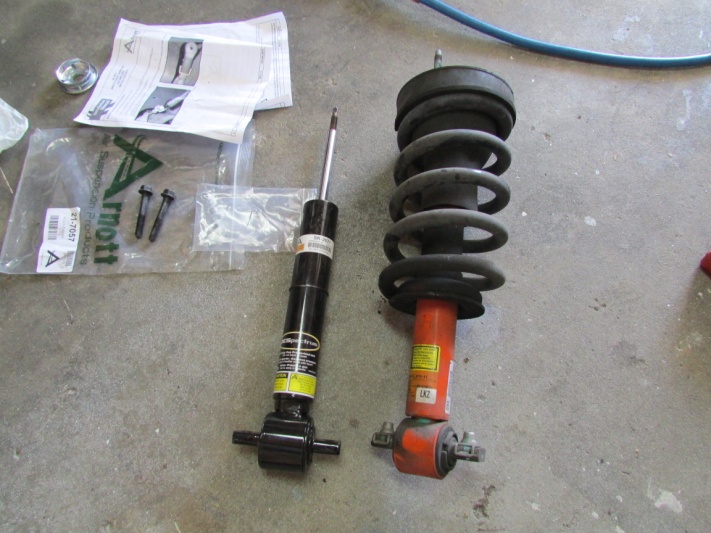
My 2007 Suburban has just over 70,000 miles on it and I had noticed the ride had become much rougher lately. I went under the vehicle and noticed the rear shocks were collecting dirt around the boot due to moisture which means they were leaking and needed to be replaced. I called a few local shops as well as the dealer and my quote for the rear alone was $2200 because of the airbags. I decided that was ridiculous and wanted to try and change them myself. I went online to AutoPartsWarehouse.com and found a set of Arnott shocks for only $200ea. This is a huge savings if I install them myself so I ordered all four shocks and received them within a few days
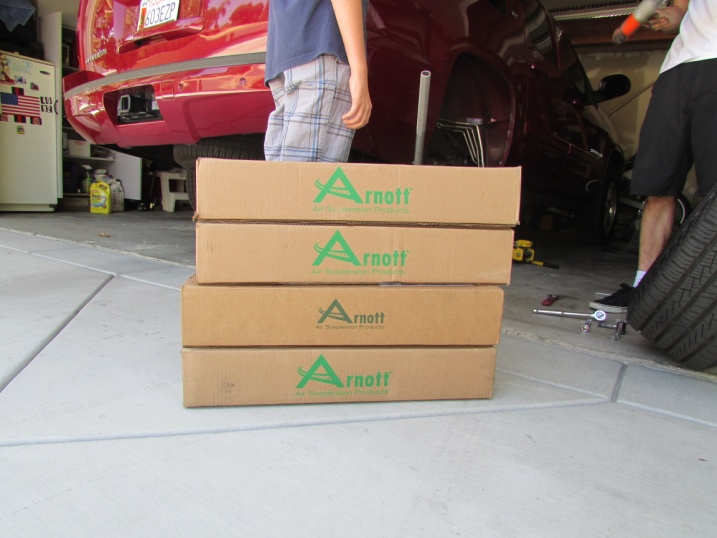
To begin the install I opened up the boxes to confirm that I received the correct shocks, and I did. Next I made sure the vehicle was parked on level ground and got out all the tools I would need.
Tools required:
- Socket Set (1/2” preferred)
- Extension for Sockets
- Crescent Wrench
- Needle Nose Pliers
- Flat Head Screwdriver ( for center cap on wheel)
- Coil Spring Compression Tool (optional) rented from local auto parts shop
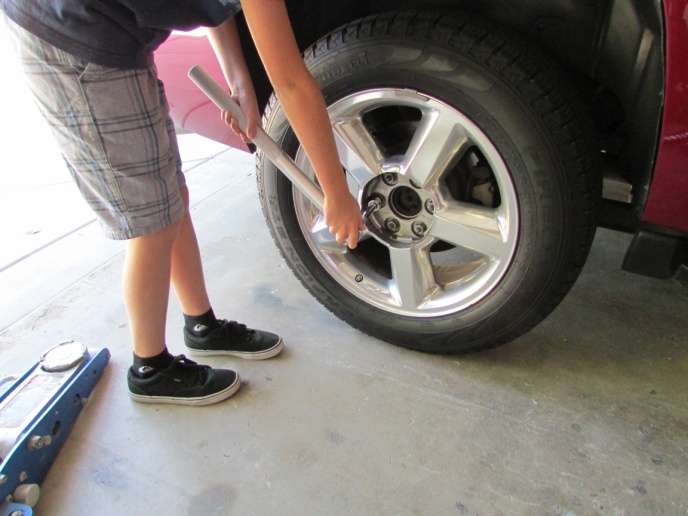
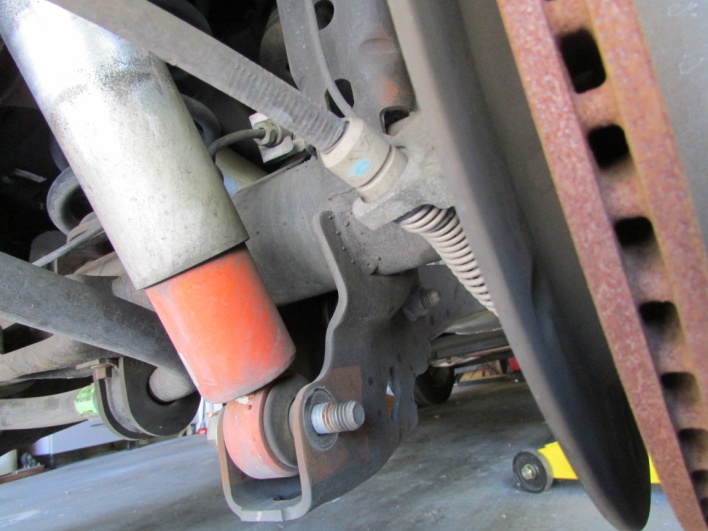
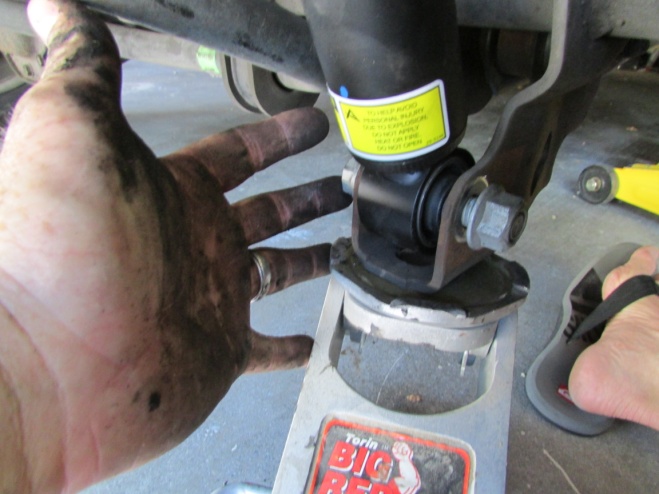
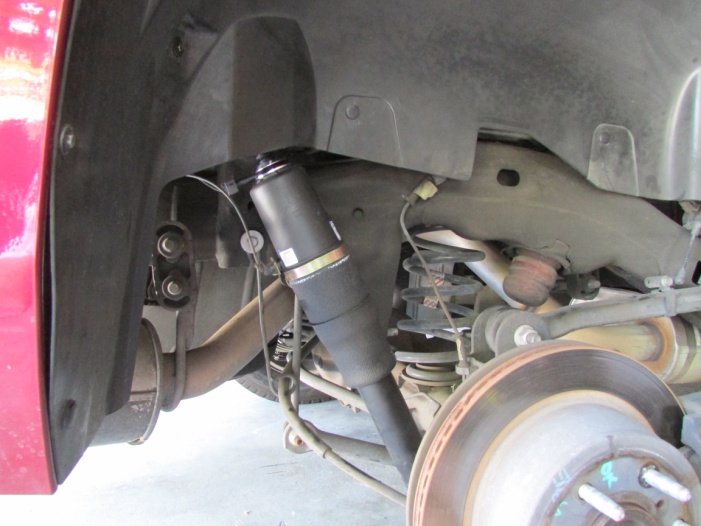
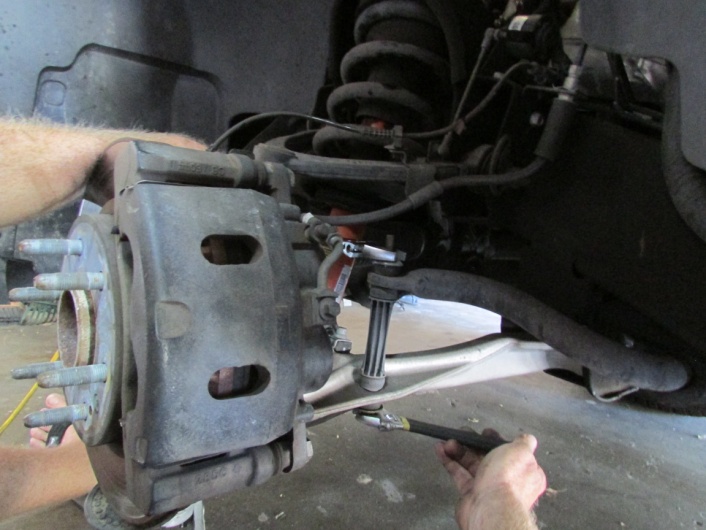
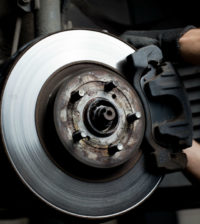
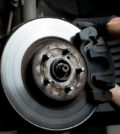
I started with the rear shocks first because I figured they would be more challenging. First step was to remove the center cap of the wheel and loosen the lug nuts. Then I jacked up the rear of the Suburban and removed the lug nuts and wheel. To gain better access of the shock I removed the inside wheel trim which was held in by a few hex head screws and a plastic pin.
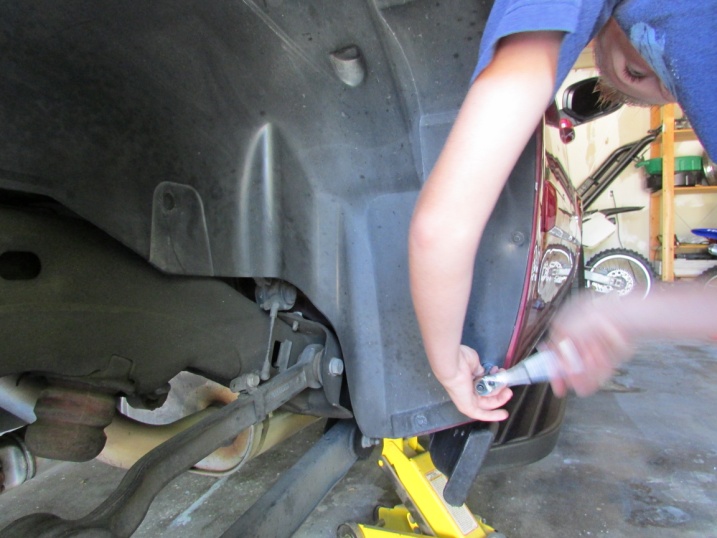
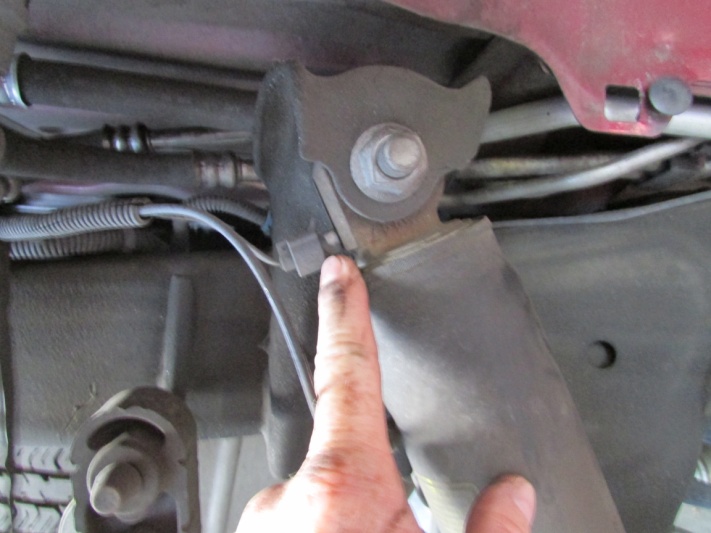
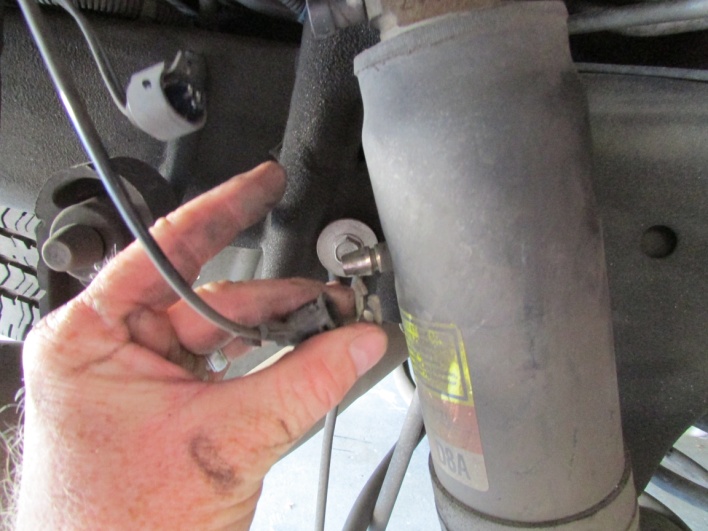
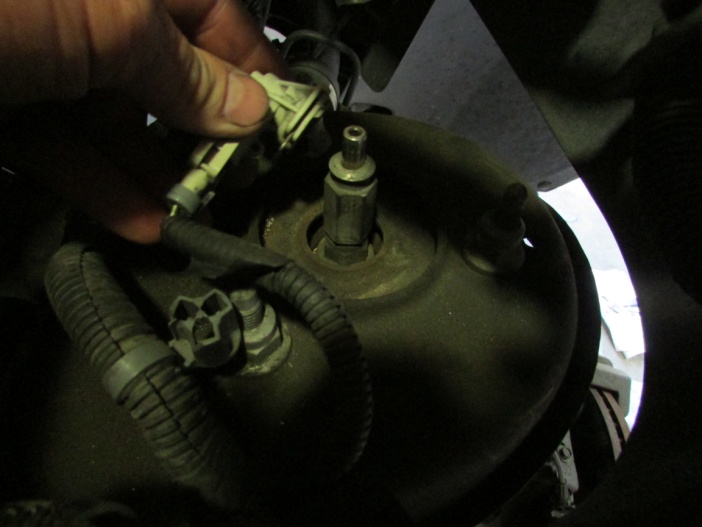
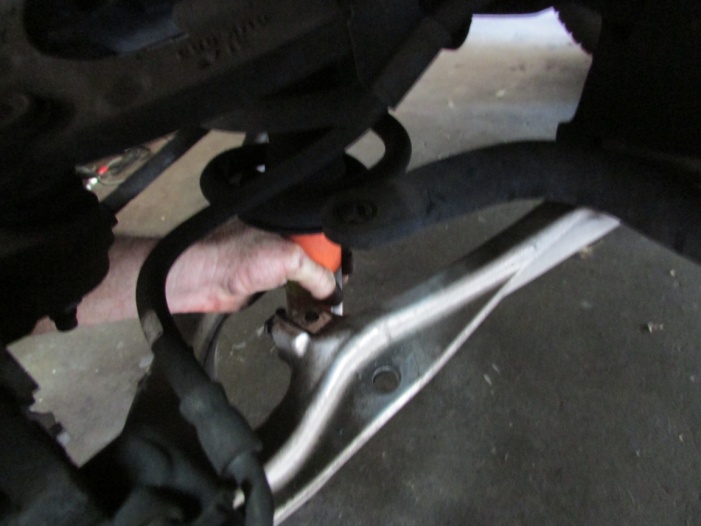
Once the trim piece was removed I had plenty of room to begin. First step was to disconnect the electrical connection for the shock as well as the air line that ran to it. The electrical connection was just a standard connector that I needed to pinch the clip with my finger and pull gently to disconnect. The air line had a small rubber boot with a metal pin holding it in place. The metal pin can easily be removed with a small flat head screwdriver or needle nose pliers. Just spread the clip open and pull it off the connector. The rubber connector can then be pulled off.

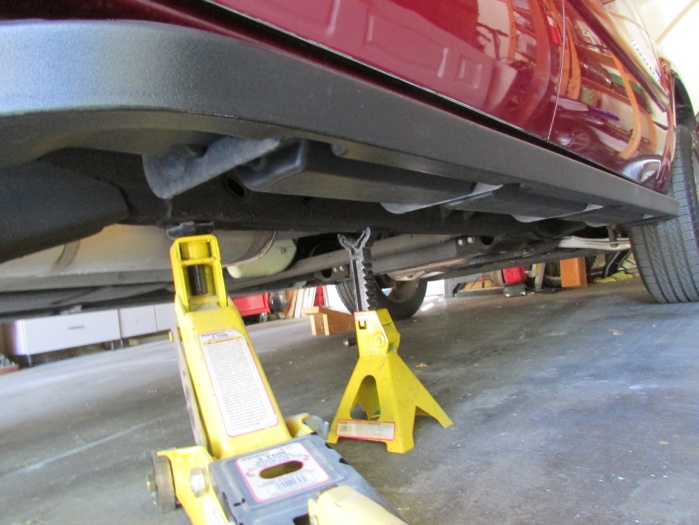
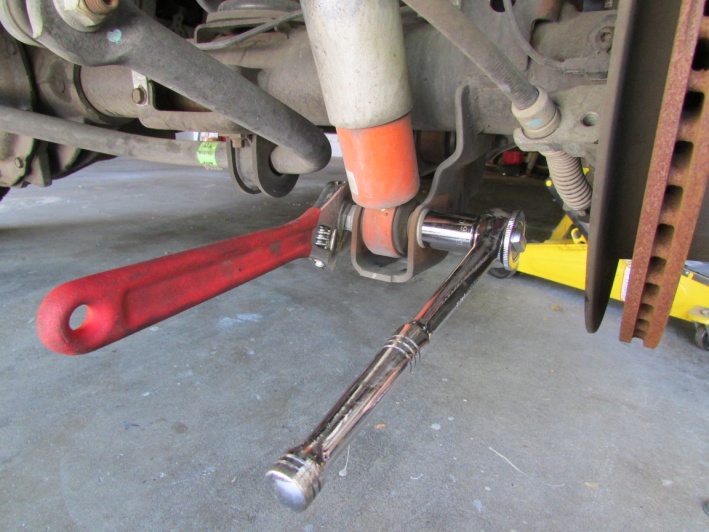
Once electrical and air lines were disconnected I was ready to remove the two bolts holding the shock in place. I removed the lower nut using a socket wrench and a second wrench to keep the bolt from spinning. To remove the upper bolt I needed an extension on the socket to reach through a few hoses that run along the frame, making it difficult to access. Once the nut was removed from both shocks I used a second floor jack or a jack stand to support the rear suspension and then pushed out the bolts. I would recommend removing the lower first and then the upper to make it easier. I needed a small screwdriver to help push the upper bolt through.
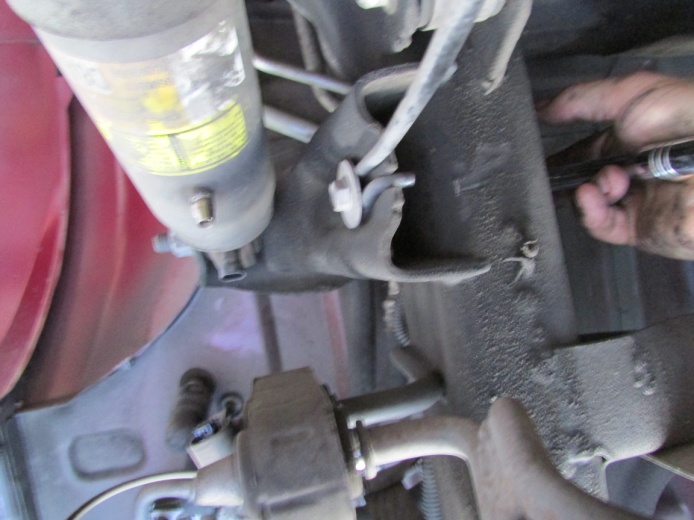
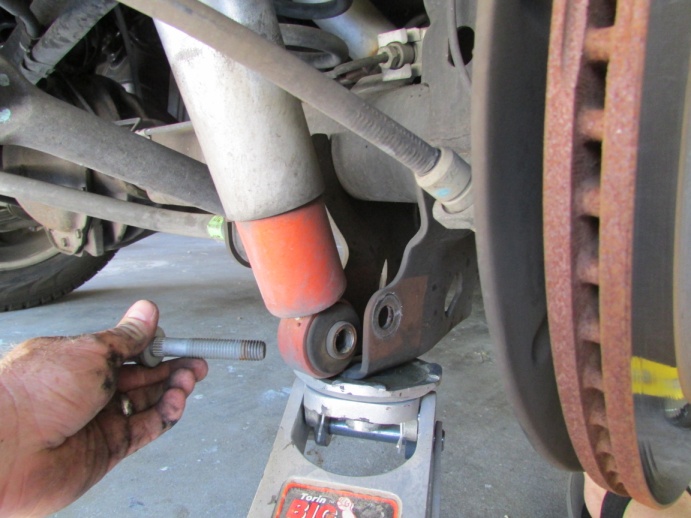
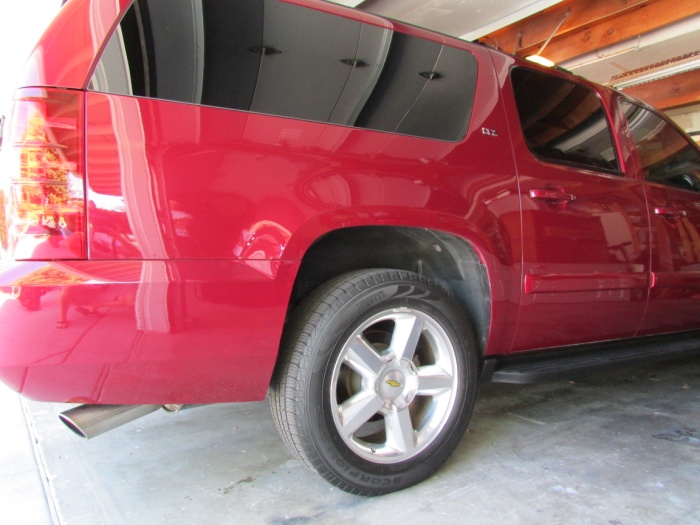
Once the shock was removed the new Arnott replacement shock fit right in. I replaced the upper and lower bolts holding the shock in place and tightened the nuts securing them. The electrical and air lines hooked right back onto the shock just as the factory shock was connected. I was surprised at how easy the Arnott shock was to install! After tightening the nuts and hooking up the electrical/air lines I put the wheel back on and lowered the vehicle to the ground. The last test was to start the engine and make sure no error codes came up and the compressor filled the shock. I was pleased to see no errors and the shock filled and was ready to go! I repeated the same procedure on the opposite side next and the rear shocks were done in about 1 ½ hrs including photo time.
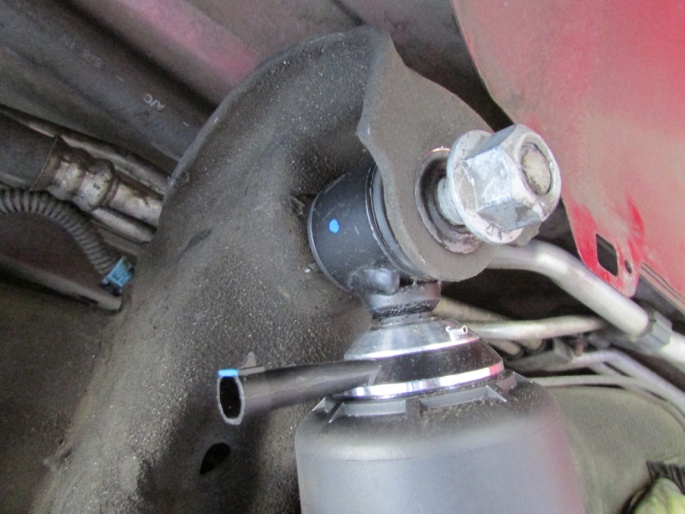
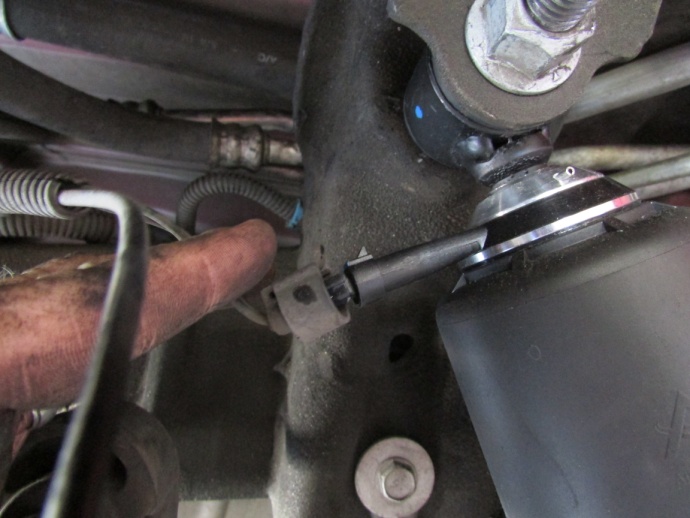
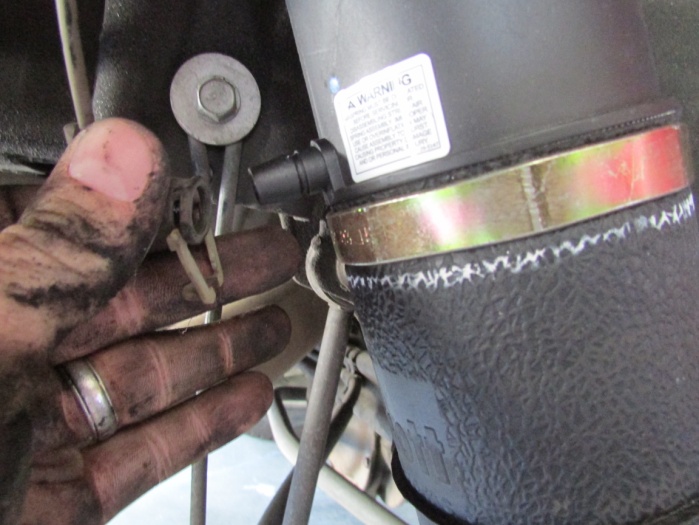
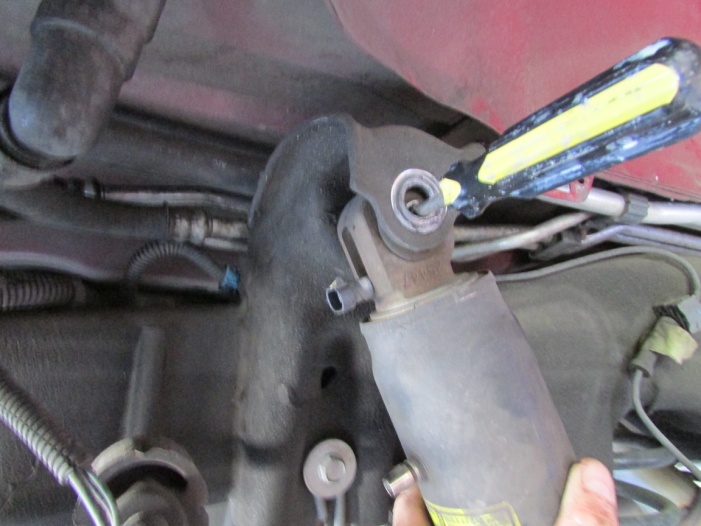
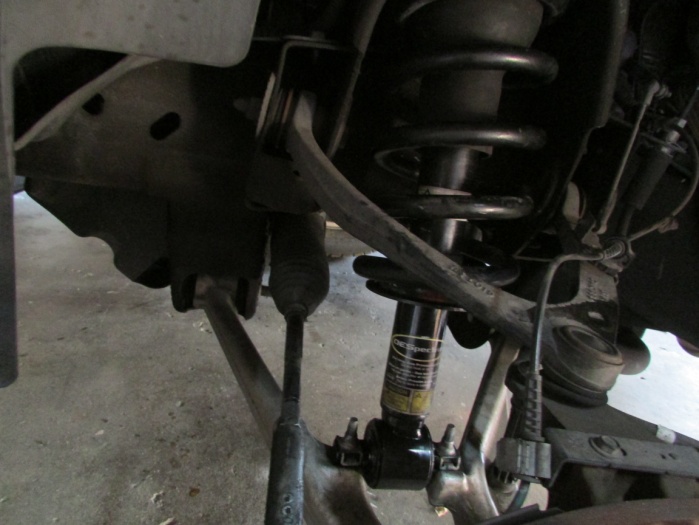
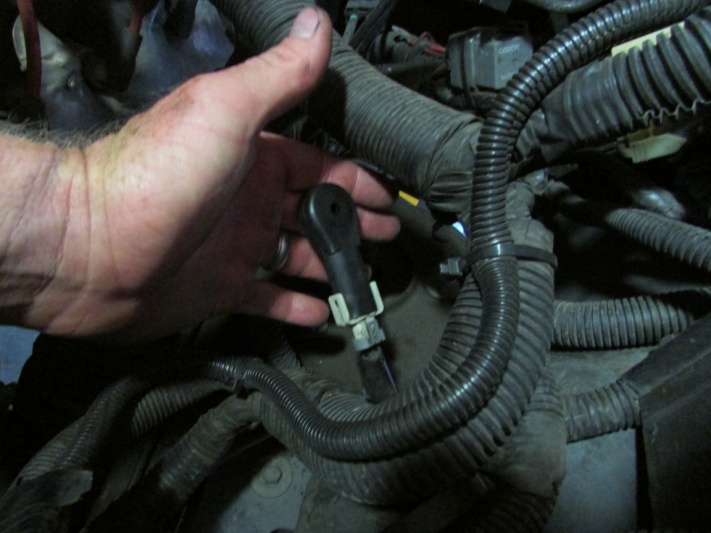
Once the rears were done it was time for the front. I removed the front wheel as well for this install however it was not necessary to remove the underside plastic trim for access. The front shock on my Suburban had an airline and electrical connector that connected to the center bolt on top of the shock, but it is not used. To unhook that I pressed in the thin metal clip on the connector and gently pulled up on it. There was also a grey plastic cap on top of another bolt that simply acts as a retainer clip for wires running through there. That can just be pulled off and set aside.

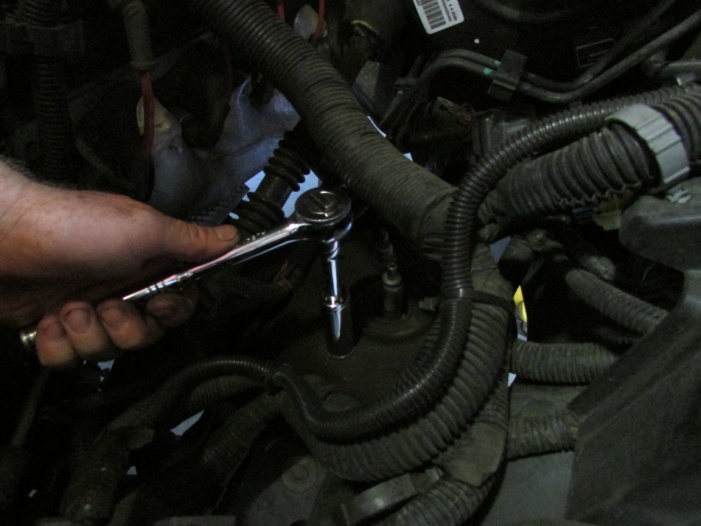
After those connections were removed I began to unbolt the shock assembly. I started with the three nuts on top of the assembly which can be accessed from the engine compartment with a socket wrench or from under with a standard wrench. The bottom of the shock sits on the lower control arm secured by two bolts.
Once all bolts were removed I trouble getting the shock assembly out, I needed the lower control arm a little bit more so I removed a support piece that limits the travel of the control arm. This gave me about 1” more travel which allowed me to remove the assembly. To remove the assembly I pushed up on the shock and pushed it in towards to vehicle to un seat it. The assembly then came down and out.

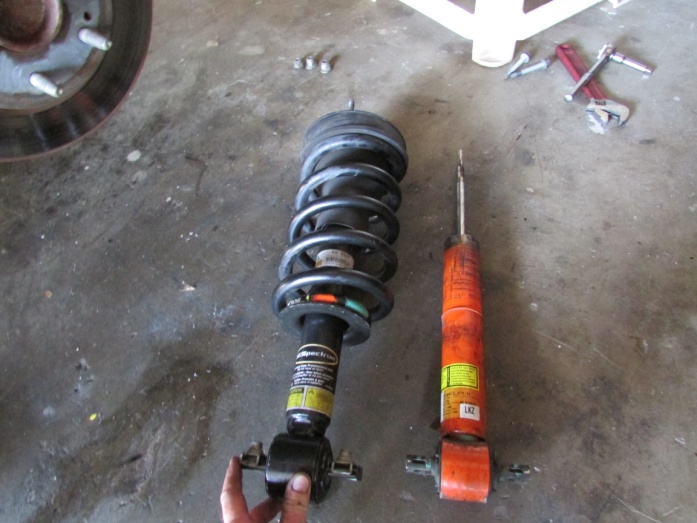
I had trouble removing the shock from the assembly so I ran up to the local auto parts store to rent a spring compression tool. After trying for about 45 mins to loosen the top nut from the assembly I was unsuccessful and was frustrated. I called a local tire shop and asked for advice. They let me know that without high power air tools I was not going to get that assembly apart. They offered to take it apart and insert the new shock for $20 each. I was relieved to know it was not something I was doing wrong, it was not possible with my tools. I then needed to remove the other front assembly so I could have them both swapped out. It took me about 20mins to remove the other side and I was off to the shop. They had the switch done in 20 mins, money well spent!
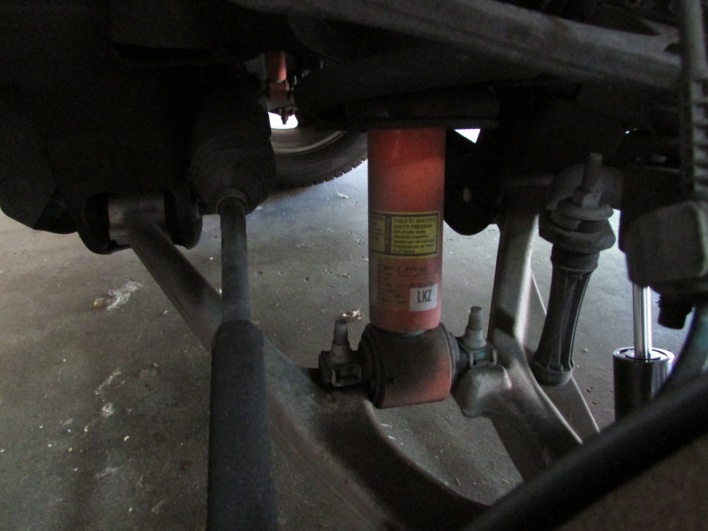
After getting the shock assemblies back home it was time to put them back in. To reinstall the shock I pushed it up from under, lining up the three bolts on top with the holes on the mount. I had to push down on the lower control arm a bit to allow the lower part of the shock to sit on it. Once it was set in place I secured the nuts on the top of the assembly first. To secure the bottom you need to make sure the metal clip that holds the nut for the bottom screw is on the new shock. These must be removed from the original shock and put on the new ones. They are easy to remove, just use a flat head screw driver and pry off. To put them on the new shock just press firmly and they will snap into place. Next I replaced the plastic support piece that connected the sway bar to the lower control arm.
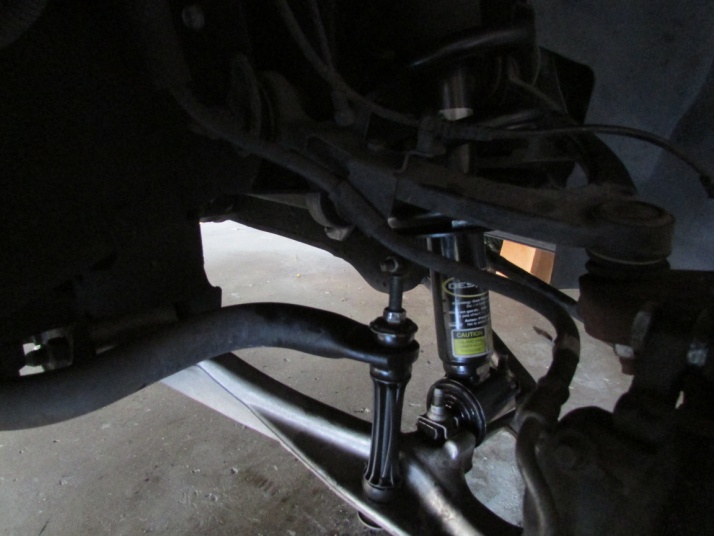
The Arnott front shocks came with a black plastic piece that needs to be connected to the wire assemble on top of the shock, unless your suburban has air shocks on the front as well. Instead of hooking up the air line as the factory shock was on top, I unclipped the piece on the tip of the factory clip and replaced it with the provided black piece. Arnott provided instructions for this step. This piece is provided so that no alarms or errors are triggered on the dash.
Once that piece was connected I secured it with a zip tie and it was time to put the wheels back on! Both front tires were put on and the vehicle was lowered off the jacks. I took the Suburban for a test drive and immediately noticed a difference as I backed out of the driveway. I didn’t realize how worn my old shocks were. I drove to a parking lot that had several speed bumps and went over them and varying speeds.
Overall I am very pleased with the Arnott shock as well as the ease of assembly for the rear shocks. The front shocks were a challenge only because I did not have the proper tools to disassemble the shocks. I feel this is a project most owners can take on with the right tools and/or help from a local shop. Even with the $40 I spent for the two front shocks to be separated I still saved myself a lot of money by doing it myself.
Here are links to the Arnott shocks I installed:
Front:
http://www.autopartswarehouse.com/sku/Arnott/Shock_Absorber_and_Strut_Assembly/ARNSK2671.html
Rear:
http://www.autopartswarehouse.com/sku/Arnott/Shock_Absorber_and_Strut_Assembly/ARNAS2700.html
Related Posts


-
 Kendall Motor Oil Knowledge Session-Things to know about Full Synthetic Motor Oil Additives
By AutoPartsWarehouse Staff, images courtesy of Kendall Motor Oil...
- November 10, 2017
-
 Kendall Motor Oil Knowledge Session-Things to know about Full Synthetic Motor Oil
By AutoPartsWarehouse Staff, images courtesy of Kendall Motor Oil...
- November 10, 2017
-
 Autolite Iridium XP Spark Plug Install
by Steve and Gavin Maloof The guys at AutoPartsWarehouse...
- August 2, 2017
-
 Car Care 101: Common Reasons Why Your Brakes Squeak
Does it bother you when you hear unusual noises...
- June 28, 2017
-
 Car Care Checklist for Summer: Part II
Here are more things to consider to get your...
- June 24, 2017
-
 Top Five Auto Parts the Average Consumer Should Purchase Online — and Here’s Why!
AutoPartsWarehouse.com says the Internet is the best place for...
- January 21, 2013
-
 Summertime is Summer Tire Check Time: 7 Tips To Combat 11,000+ Tire-Related Accidents Annually — and Keep Tires Rolling for Longer
U.S. drivers put almost 3 billion miles on their...
- June 4, 2014
-
 AutoPartsWarehouse.com 2013 Child Passenger Safety Tips and Resource Guide
A Wake Up Call On Child Passenger Safety The...
- September 12, 2013
-
 6 Amazing Classic Car Restorations
Restoring old cars always come with a hefty price...
- November 24, 2014
-