- Summertime is Summer Tire Check Time: 7 Tips To Combat 11,000+ Tire-Related Accidents Annually — and Keep Tires Rolling for Longer
- 10 DIY Tips to Add Years to a Vehicle’s Life & Minimize Expensive Repairs
- Defensive Driving Tips to Avoid Costly Repairs As Wintery Driving Conditions Continue to Plague Roads
- AutoPartsWarehouse.com 2013 Child Passenger Safety Tips and Resource Guide
- Top Five Parts to Make Your Vehicle More Fuel Efficient
Review: Rancho RS9000XL Suspension
Project: Rancho RS9000XL Suspension
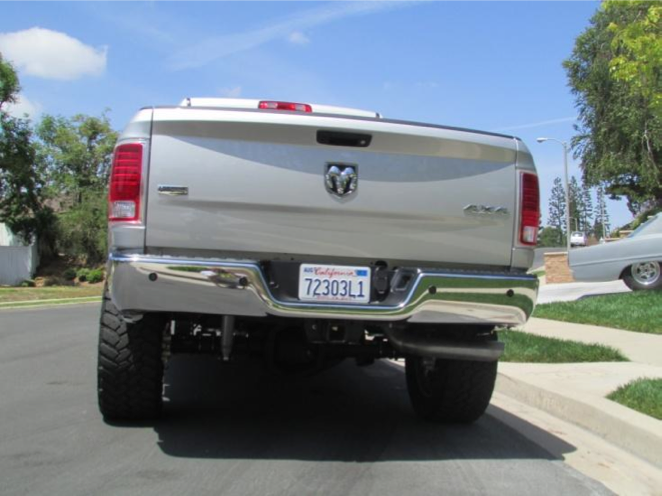
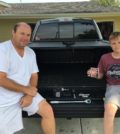
Vehicle: 2013 Dodge Ram 2500 Laramie 4×4
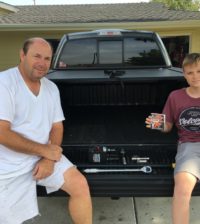
Owner/Installer: Steve Maloof
Level of Difficulty: Easy
Brand Store: Rancho Shocks
Overview
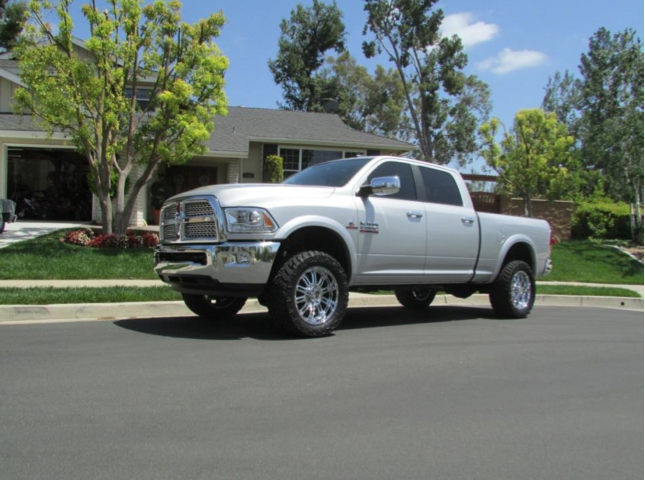
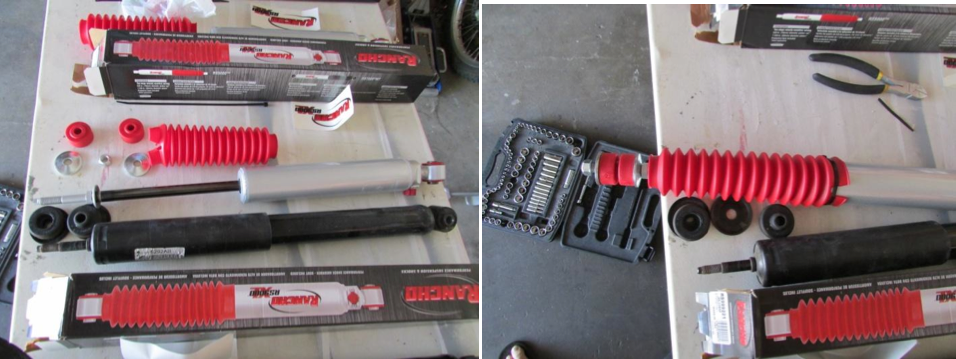
After owning my truck for about a year and adding a few aftermarket upgrades, I decided to address the stiff ride that my Ram came with. I looked at just about every option with regards to shocks and decided on the adjustable Rancho RS9000XL. I ordered the shocks from AutoPartsWarehouse.com and they arrived on my porch three days later.

First Impressions
The shocks came with no instructions for installation; however, the install was pretty self explanatory. First, I took all the shocks out of the boxes to confirm I had two front and two rear shocks, which I did. So it was time to get started. First step was to prep the Ranchos by twisting the shaft and extending them out. I then slid the boot over the end and secured it to the shock. I used the provided zip ties to secure the boot prior to the install which was not a good idea. You will see in some of the pictures that the opening was exposed on the side of the boot and I had to cut the zip tie to rotate it so it looked better–not a big deal but I am pretty meticulous and wanted it to look perfect.
Tools Required

Installation
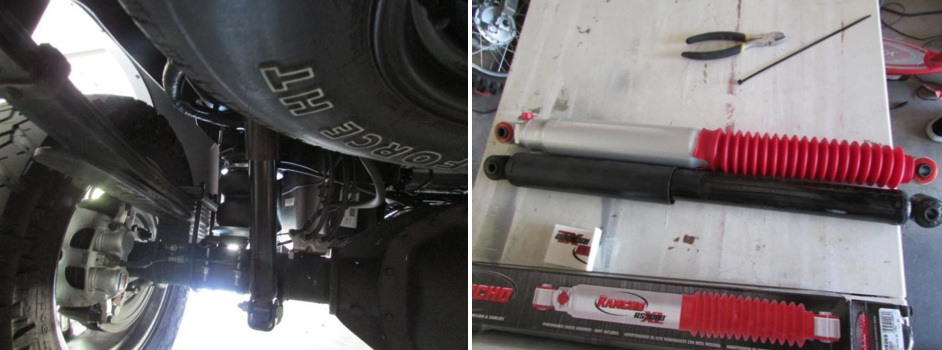
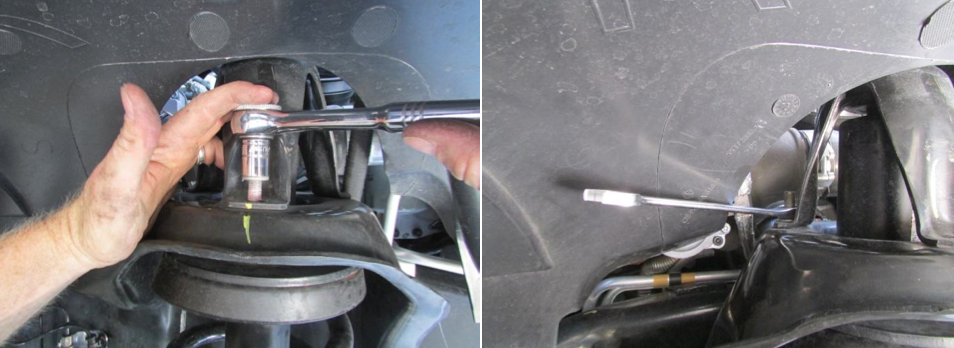
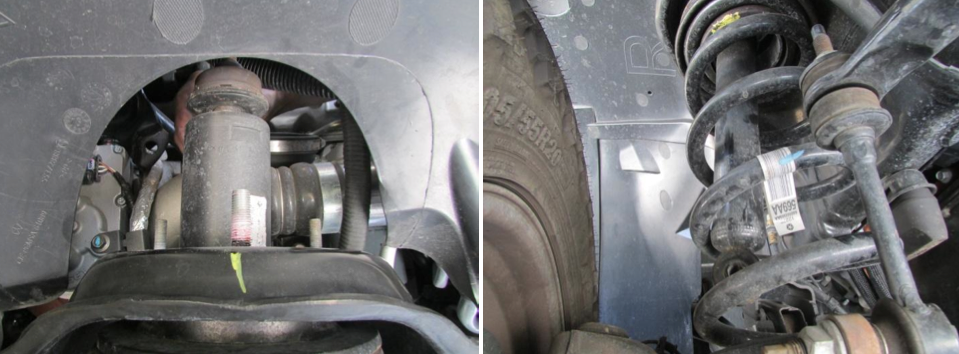
Once the shocks were ready, I got under the rear of the truck to remove the original shocks. It was not necessary to use jacks, lift the suspension or remove the wheels. I was able to remove the lower bolt holding the shock, then reached up to remove the upper nut. One lower bolt and a nut on the top of each shock and they were out–very easy.
Driver Side:
Passenger Side:
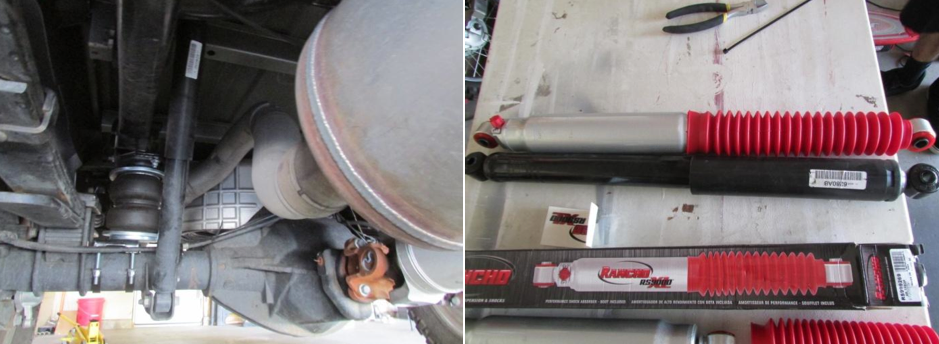
The total installation time for the rear shocks was less than 30 minutes. Once the shocks were installed I was able to adjust the zip ties holding the bottom of the boot and then put the Rancho sticker on! I chose to install the shocks with the adjustment dial facing up after reading a few online posts regarding road debris over time causing the dial to freeze or not turn. Hopefully this will keep it clean and working properly.
Now on to the more difficult part of the installation. For the front shocks, I found it necessary to lift the front end of the truck to allow the shock to extend and be uncompressed. I lifted the frame just enough to extend the shock, wheels still on the ground. First step was to remove the new Ranchos from the box and get them ready to install. Just as I did for the rear shocks, I extended the shaft and put the boot on. The front shocks came with hardware to secure the top.
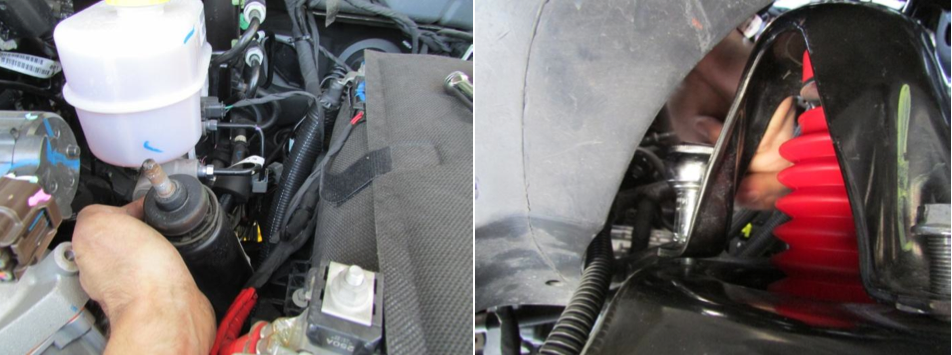
After looking at the front suspension I found the best access to the top of the shock was from the engine compartment. Starting with the driver’s side, I found the nut securing the shock between the battery and the brake reservoir. I first tried a socket wrench with an extension and found that the shock just turned with it. The post that extends through the shock tower has a hex style tip used to hold the shock from spinning, so I used a pair of vice grips along with an open end wrench to loosen the top nut. Once loose I was able to use the socket wrench to take it all the way off.

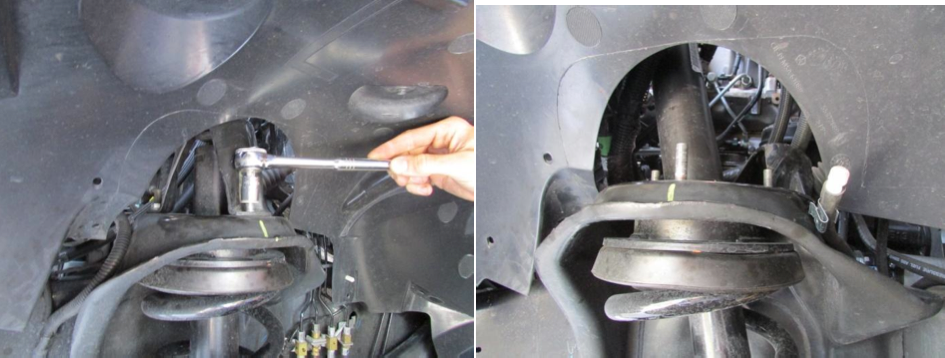
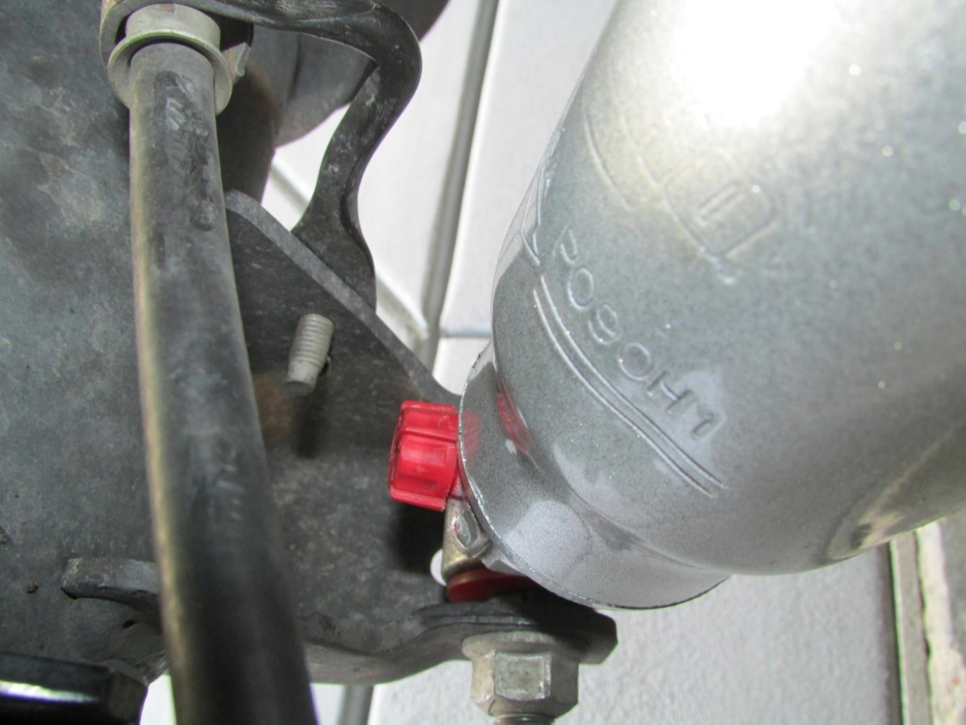
After the top nut was off I went under the truck to loosen the bottom bolt holding the shock. To access the head of the bolt, I used the socket wrench with an extension and placed it through a preexisting hole in the front axle bracket. This bolt was screwed into a welded in place nut so no need to place a wrench on the other side.

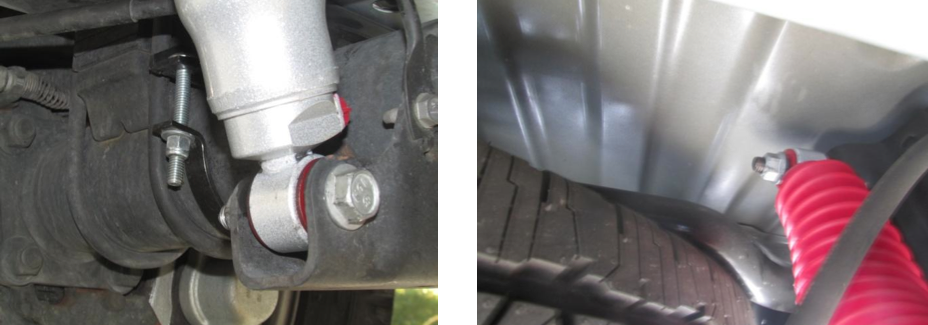
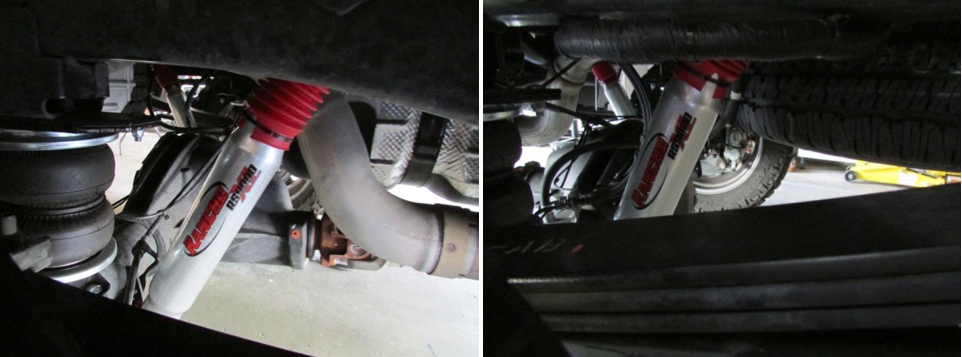
Once this bolt was removed the shock was loose but I still needed to remove the retaining bracket on the top. This cone style bracket had three nuts holding it in place which I accessed from just above the wheel. I could have removed the wheel for a little better access but didn’t find it to be necessary. Once three nuts were off I just lifted the bracket off the bolts and set it aside. I was then able to pull the stock shock up through the engine compartment and slide the Rancho shock down through the same place and reassemble.
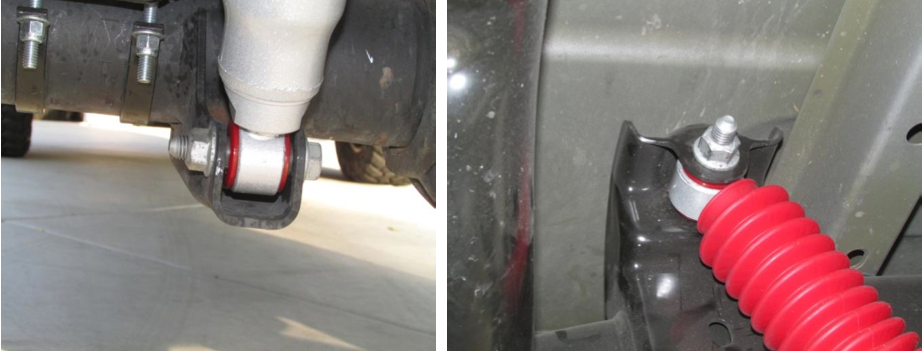
After positioning the Rancho with one of the washers and bushings, I placed the mounting bracket back over the top of the shock. When putting the bracket back on one of the washers and red bushing goes below the bracket and the other goes above it to be secured with the top nut, just as the original shock was. Once the shock assembly was in place I tightened the lower bolt and then the nut on top of the shock.

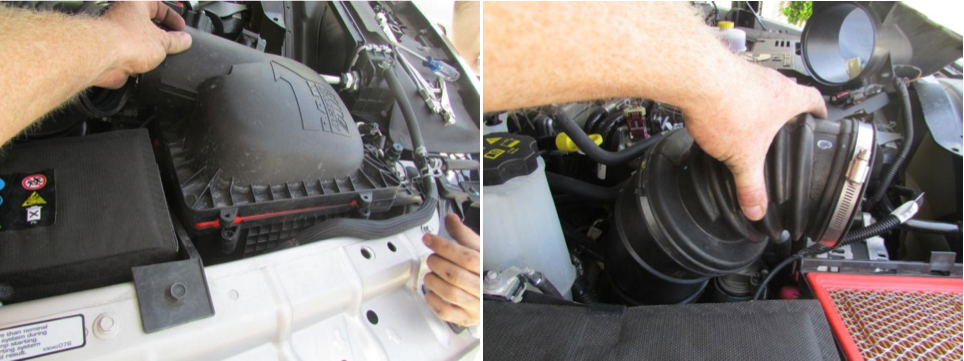
Moving over to the passenger side I found that access from the top was even more challenging than the driver’s side. I decided to remove the air filter cover and intake hose to improve my access to the top mount. To remove the filter cover I backed out the three screws on top. Then I loosened the retaining strap screws on the hose and was able to pull the assembly out.
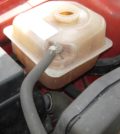
With the intake removed you can see I have much better access to the top stud of the shock. It is located just under the coolant overflow between the A/C line and battery cable. I removed the top nut just as I did on the other side and then removed the bottom bolt of the shock. Once the shock was free I removed the top bracket allowing me to pull the shock up through the engine compartment.


As you can see here it was a tight fit and I had to be very careful while removing the original shock then installing the new Rancho shock. The Rancho shocks slide right in and I secured it just as I did on the driver’s side. The lower bolt went in first to hold it then I placed the lower washer and bushing prior to putting the top bracket in place.
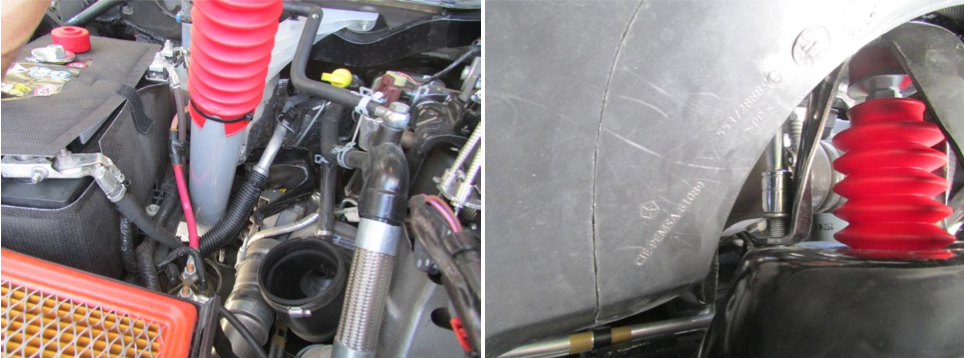

The picture above shows the top of the shock bracket with the upper bushing and retaining washer in place. Once I tightened the top bolt down I was ready to replace the intake components and zip tie the boot and put the Rancho sticker on! Total install time for the front shocks was 1 hour.
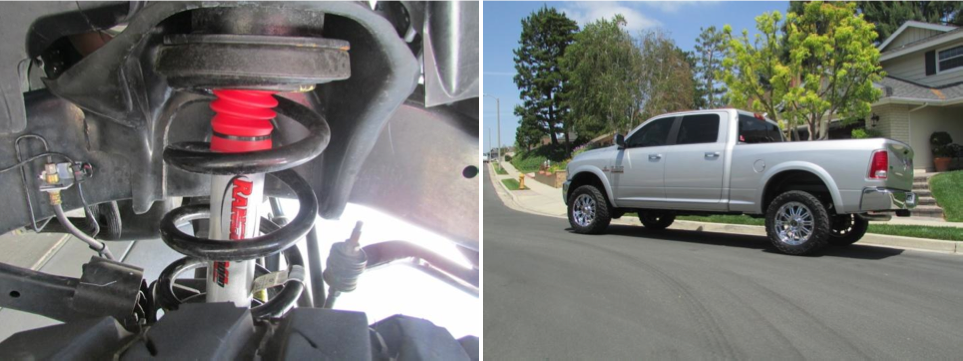

Rancho’s RS9000XL adjustment range-courtesy of GoRancho.com
Close up of shock tuning switch:
When I first installed the Rancho RS9000XL I set them to the softest setting possible, turning the dial counter clockwise to a setting of 1. I drove the truck for a day at this setting and found it to be too soft. Then I turned the dial clockwise to 9, which was the stiffest and found it to be a little too firm. I found that a setting right in the middle gave me the most comfortable drive for everyday use. While driving in normal conditions I found the shocks performed similar to the factory shocks but with a major improvement in ride comfort over bumps and road irregularities. The Rancho RS9000XL’s deliver more controlled suspension compression and rebound without the harsh “crashing” I experienced with the stock shocks.
The bottomline
Overall, I am very happy with the look and feel of the Rancho RS9000XL’s. Most of all, I am glad I now have the ability to adjust the shock for my changing driving conditions as I tow my trailer or take the truck off- road loaded with dirt bikes and our gear. Great product Rancho!
Related Posts

-
 Kendall Motor Oil Knowledge Session-Things to know about Full Synthetic Motor Oil Additives
By AutoPartsWarehouse Staff, images courtesy of Kendall Motor Oil...
- November 10, 2017
-
 Kendall Motor Oil Knowledge Session-Things to know about Full Synthetic Motor Oil
By AutoPartsWarehouse Staff, images courtesy of Kendall Motor Oil...
- November 10, 2017
-
 Autolite Iridium XP Spark Plug Install
by Steve and Gavin Maloof The guys at AutoPartsWarehouse...
- August 2, 2017
-
 Car Care 101: Common Reasons Why Your Brakes Squeak
Does it bother you when you hear unusual noises...
- June 28, 2017
-
 Car Care Checklist for Summer: Part II
Here are more things to consider to get your...
- June 24, 2017
-
 Top Five Auto Parts the Average Consumer Should Purchase Online — and Here’s Why!
AutoPartsWarehouse.com says the Internet is the best place for...
- January 21, 2013
-
 Summertime is Summer Tire Check Time: 7 Tips To Combat 11,000+ Tire-Related Accidents Annually — and Keep Tires Rolling for Longer
U.S. drivers put almost 3 billion miles on their...
- June 4, 2014
-
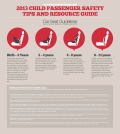 AutoPartsWarehouse.com 2013 Child Passenger Safety Tips and Resource Guide
A Wake Up Call On Child Passenger Safety The...
- September 12, 2013
-
 6 Amazing Classic Car Restorations
Restoring old cars always come with a hefty price...
- November 24, 2014
-