- Summertime is Summer Tire Check Time: 7 Tips To Combat 11,000+ Tire-Related Accidents Annually — and Keep Tires Rolling for Longer
- 10 DIY Tips to Add Years to a Vehicle’s Life & Minimize Expensive Repairs
- Defensive Driving Tips to Avoid Costly Repairs As Wintery Driving Conditions Continue to Plague Roads
- AutoPartsWarehouse.com 2013 Child Passenger Safety Tips and Resource Guide
- Top Five Parts to Make Your Vehicle More Fuel Efficient
Review: AEM Cold Air Intake
Overview
Project: AEM Cold Air Intake
Vehicle: 2013 Dodge Charger R/T
Level of Difficulty: Easy
Owner/Installer: Stan Maloof
I purchased a new Dodge Charger R/T a few months back. It’s my first Hemi and so far it’s been great. I’ve heard that there are a few easy ways to unlock the performance of this popular engine. After watching a few videos and reading some online reviews, I decided that a cold air intake would be a simple and cost-effective way to increase power from the sweet Hemi. I’m typically the guy who takes his car to the shop to get everything from brakes to aftermarket add-ons installed. This time, however, I wanted to save a few bucks and decided to tackle the installation myself.

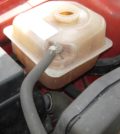
The Dodge Charger’s Hemi Engine
Installation
Since I have not installed a system like this before, I made sure to take my time in the disassembly of the stock system and kept all the OE pieces, just in case. The text and illustrations within the instructions were very helpful throughout the process. During disassembly, I only felt lost a couple of times.
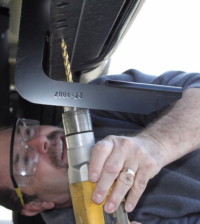
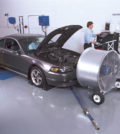
The first time I felt lost was while removing the belly pan to access the underside of the intake system. In fairness to AEM, the instructions mentioned the fact that the clip, screw and bolt pattern will vary with each vehicle. The instructions led me to believe there was just one belly pan to remove. My Charger has two pans that cover the front of the vehicle. I tried to take a shortcut by attempting to install after removing only the pan towards the rear of the vehicle. As it turned out, both pans required removal; I had to backtrack and remove the other pan as well so I can perform the install properly.
The second time I felt lost was just after removing the belly pan. The instructions went from belly pan removal to the optional air deflector removal (which I opted to do). There was no mention of the lower air box firmly mounted to the frame. While removing this piece, I actually thought I was removing the air deflector. When I checked the illustration, I noticed that my “air deflector” looked nothing like the one in the picture; I quickly learned it was actually the lower air box. After removing that piece, I found and removed the air deflector.

Disassembly requires removing both pans in the front of the vehicle
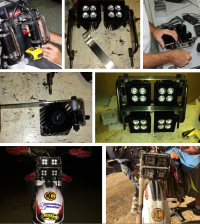
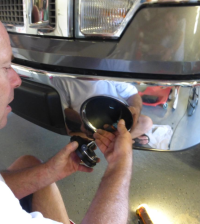
With disassembly now complete, I pack all the OE components and put the loose bolts, screws and clips in a bag. I laid out the AEM kit parts and began the install. Installation of the lower intake system (rubber mount, rubber coupler, lower pipe, filter and IAT sensor) was quick and easy. I was a bit surprised at how tight the space was around the filter, but once again, the illustrations provided a level of assurance that I was on the right track.

The components of the lower intake system

Space is tight around the air filter
The electrical connections up top were next in the installation process. My kit included two 20Ga extension wires. I wasn’t sure if both were needed for my install. It took a few head-scratching moments, but I soon realized I only needed one of them. The instructions referenced use of perma-seal connectors which were not included in the kit. Splicing the extension wires into the existing harness was a straight forward process, but special attention must be paid to ensure consistency in the coloring of the wires. (You need to make sure the extension wire connected to the blue wire on the IAT is the same wire connected to the blue wire near the throttle body). Routing the wires properly and using the zip ties provided ensure a clean install with no clutter.
With the wiring completed, I attached and secured the upper intake pipe and everything fit perfectly and looked great.

The completed wiring
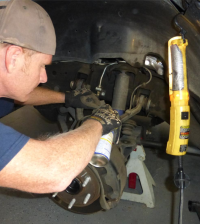
The final step was the re-installation of the belly pan and associated clips. This process was simple with a little preparation early on. During disassembly, as I removed each part, I laid them out nearby with their respective clips and bolts.
Performance
I’m really pleased with how well the install turned out. Total time commitment was three hours, two of which were dedicated to disassembly. Someone who has done this before could probably do it in half the time.

Installation is done!
With the installation of the AEM intake I was hoping to achieve three distinct changes: better sound, more HP and improved MPG. The difference in sound and “get-up-and-go” was immediately apparent. The HEMI grunts a bit more between 3500 to 4500 RPM with a noticeable increase in power. I have also observed a slight increase in MPG and plan on monitoring mileage more closely for definitive results.
The Bottom line
Overall, I would recommend the AEM intake to anyone looking to unlock the sound and fury from their motor. I’m enjoying the new throaty sound and “punch” from the Hemi and I definitely feel a sense of accomplishment for doing the install myself.
Related Posts

-
 Kendall Motor Oil Knowledge Session-Things to know about Full Synthetic Motor Oil Additives
By AutoPartsWarehouse Staff, images courtesy of Kendall Motor Oil...
- November 10, 2017
-
 Kendall Motor Oil Knowledge Session-Things to know about Full Synthetic Motor Oil
By AutoPartsWarehouse Staff, images courtesy of Kendall Motor Oil...
- November 10, 2017
-
 Autolite Iridium XP Spark Plug Install
by Steve and Gavin Maloof The guys at AutoPartsWarehouse...
- August 2, 2017
-
 Car Care 101: Common Reasons Why Your Brakes Squeak
Does it bother you when you hear unusual noises...
- June 28, 2017
-
 Car Care Checklist for Summer: Part II
Here are more things to consider to get your...
- June 24, 2017
-
 Top Five Auto Parts the Average Consumer Should Purchase Online — and Here’s Why!
AutoPartsWarehouse.com says the Internet is the best place for...
- January 21, 2013
-
 Summertime is Summer Tire Check Time: 7 Tips To Combat 11,000+ Tire-Related Accidents Annually — and Keep Tires Rolling for Longer
U.S. drivers put almost 3 billion miles on their...
- June 4, 2014
-
 AutoPartsWarehouse.com 2013 Child Passenger Safety Tips and Resource Guide
A Wake Up Call On Child Passenger Safety The...
- September 12, 2013
-
 6 Amazing Classic Car Restorations
Restoring old cars always come with a hefty price...
- November 24, 2014
-